User manual
Kopano Meet can be used both as a desktop app and a mobile app from the same URL. All you need is a browser to get started - and a link to ‘your meet’, received from your system administrator or by someone that wants to meet with you.
First steps

Permission Pop-up of Google Chrome
If you’re using Meet on that system for the first time, your browser will ask you if you allow access to the microphone and camera.
Note
Meet will only work if you allow the microphone and camera to be used.
General overview
When logging in, you will brought to the main screen. On the right hand side the the video of the currently selected webcam is shown. On the left hand side you have the ability to start a new call or to scroll through past calls.

The main screen in Kopano Meet
Joining a meeting
Joining a meeting is easy! You received a link via an email, or perhaps a meeting request or a chat message. All you need to do is click it! Afterwards Meet will open in your favorite browser and show you the group welcome screen from where you can “Call” into the meeting.
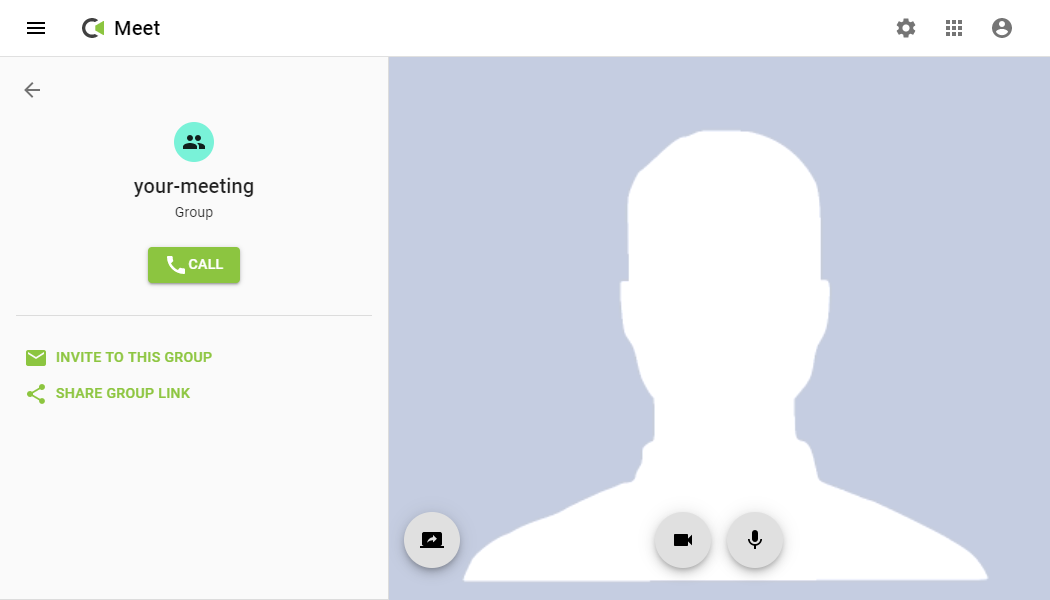
The group landing page.
One-to-one calls
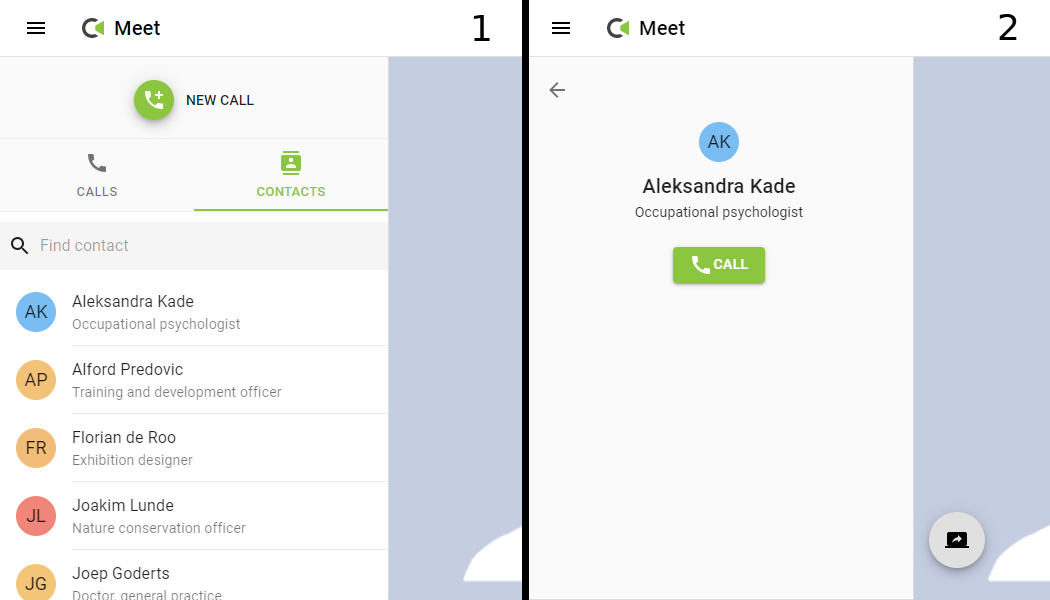
One-to-one calls can be done as follows:
- Click on “Contacts” to search and browse through users
- select on a contact to open his detailed view and get the option to call them.
While a call is being established you will see a grey background with a hourglass animation and a moving bar. Your video is moved to the bottom right of the screen.
The other side has picked up
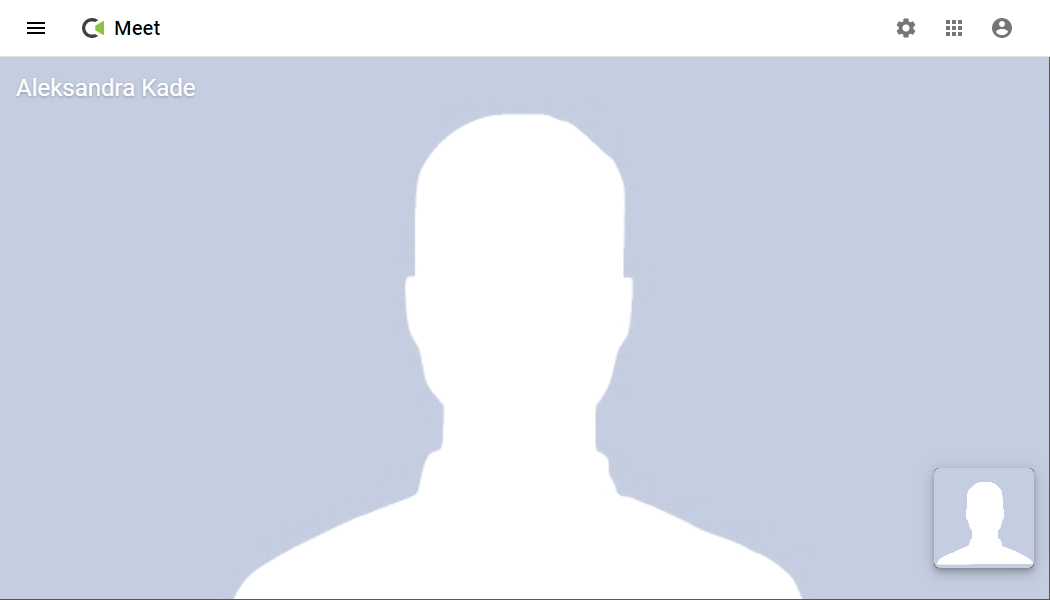
Once the other side has picked up their video will fill the screen.
Note
The call controls (hang up button, as well as video and microphone indicator) are only visible when there is mouse movement in the window. If there is no activity the controls will fade out of view.

The screen of an incoming call
When receiving a call yourself you can either accept, decline or ignore a call. Accepting will result in the call being connected with the same audio and camera settings you previously used on the main screen. Declining a call will result in a message to the caller that their call was rejected. Ignoring a call will make the call incoming call windows go away without notifying the calling user about it.
Groups, public vs. private
Kopano Meet currently knows two different kinds of groups.
- Public groups are groups that can be joined by external guests/users as long as they know the exact url. These groups are recognizable with the common namespace, by default
/public. Depending on the configuration guests will only be able to join a group meeting once a registered user has joined it. - Private groups are groups that can only be joined by registered users. Users joining this group still need to know the exact url.
The detail view of a group in Kopano Meet
Note
Rather than have your guests and colleagues type the url, you can share them the link beforehand through invitations.
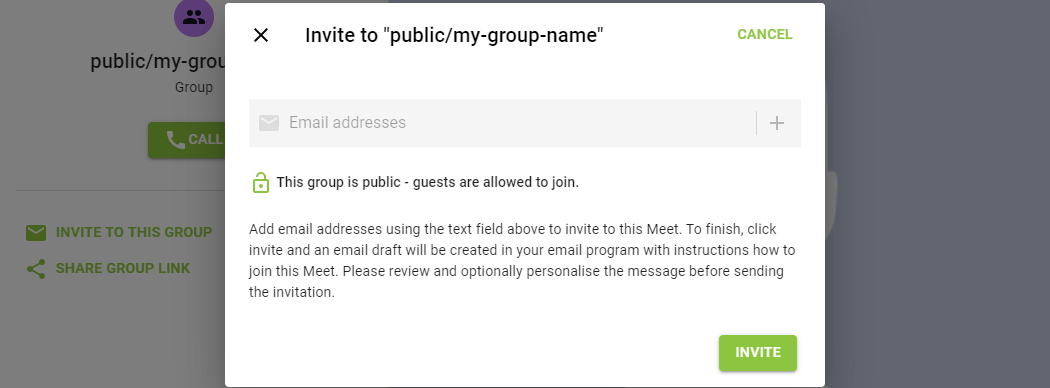
Inviting users and guests to a group
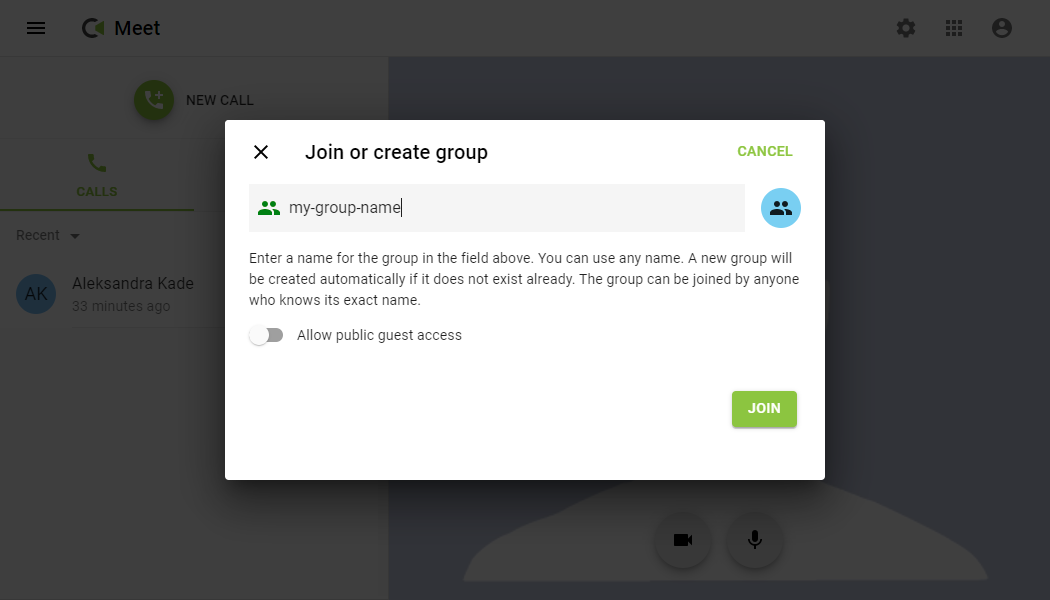
From the “New call” screen, you have the possibility to join an existing group or create a new one:
- From the Main Screen, click on “NEW CALL”.
- Click on “JOIN OR CREATE GROUP”.
- Enter the name of the group. If that doesn’t exist, a new one will be created. The “JOIN” button will become active.
- Press on “JOIN”.
Note
Toggling the “Allow public guest access” switch will add the public/ prefix to the chosen name.
Afterwards you can easily invite additional users by clicking on either “INVITE TO THIS GROUP” or “SHARE GROUP LINK”.
For invitations via E-Mail Kopano Meet performs basic sanity checks on entered email addresses. If a mail address is invalid, Meet will show a red envelope and block the “INVITE” button.
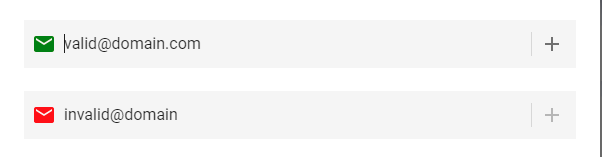
Meeting invite screen: valid vs invalid address
Note
Power/advanced users can also directly click on “INVITE” to have recipients completed by their preferred mail client.
Kopano Meet will show a notification in the upper side of the screen once the mail has been handed over to default the mail client of the user.

To invite more users the email invite flow can be restarted by clicking on “INVITE TO THIS GROUP”. To simply include a link the user can also click on “SHARE GROUP LINK” which will put the group link into the clipboard.
Note
If the device of the user supports Web Share API (like mobile devices), then instead of putting the link in the clipboard this will actually open the share menu of the device.
Sharing your screen
Kopano Meet also has the builtin ability to share your screen with other participants. This functionality is available for one to one calls, as well as group calls. Screensharing works without needed to install any plugins or extensions and is available in Google Chrome >= 72 and Mozilla Firefox >= 66.

The screensharing indicator can be found in the bottom left corner.
Note
In case a browser does not support screensharing (like a mobile device), the screensharing indicator will not be visible.
Once you have enabled screensharing, your browser will ask which desktop/window/application you want to share. Once this dialogue is closed, the screensharing indicator will turn green.
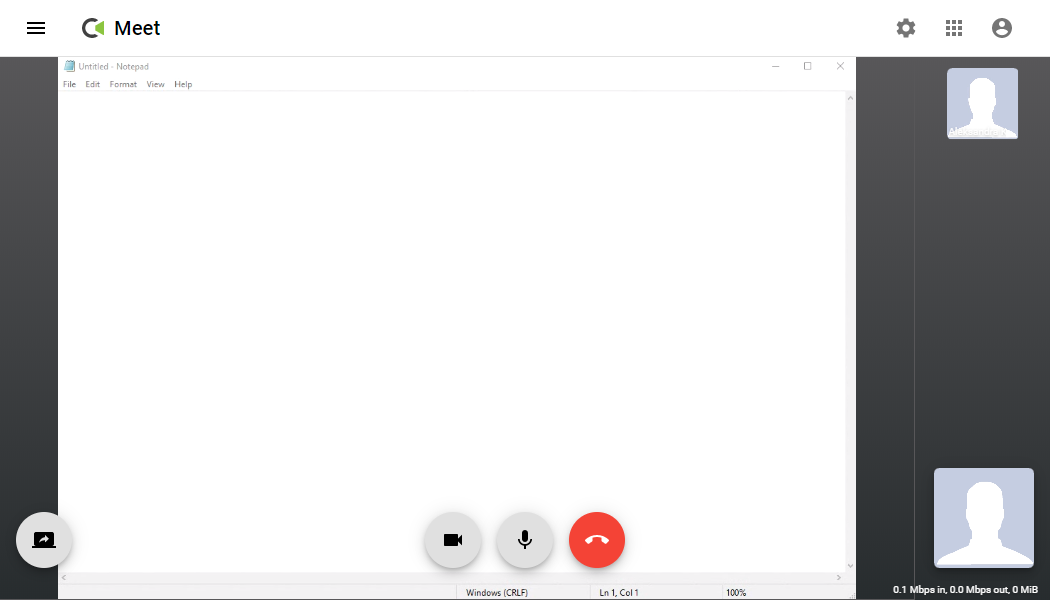
For meeting participants receiving a screen, the individual videos of the participants will be moved to the right side and the shared screen will consume most of the Meet application.
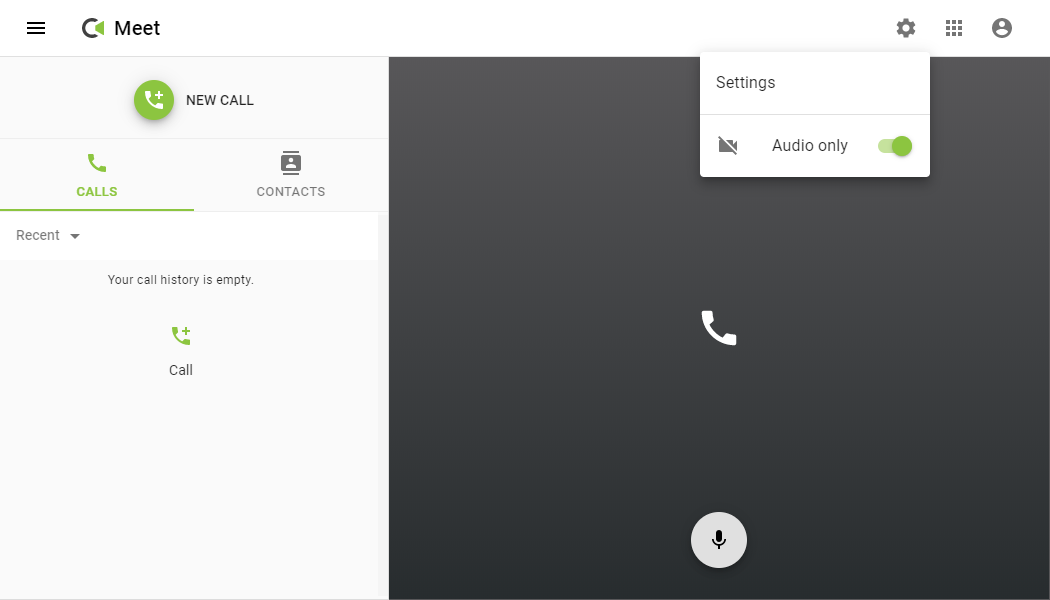
Doing an “audio only” meeting
Meet has a special “audio only” mode that can be used to preserve bandwidth with calling in from a metered connection.

The “audio only” mode can be enabled from the settings menu at the top of the screen.
Note
Toggling the switch into the “on” position will disable both incoming and outgoing video stream and also disabled the screensharing button.
Selecting the right Camera/Microphone/Speaker
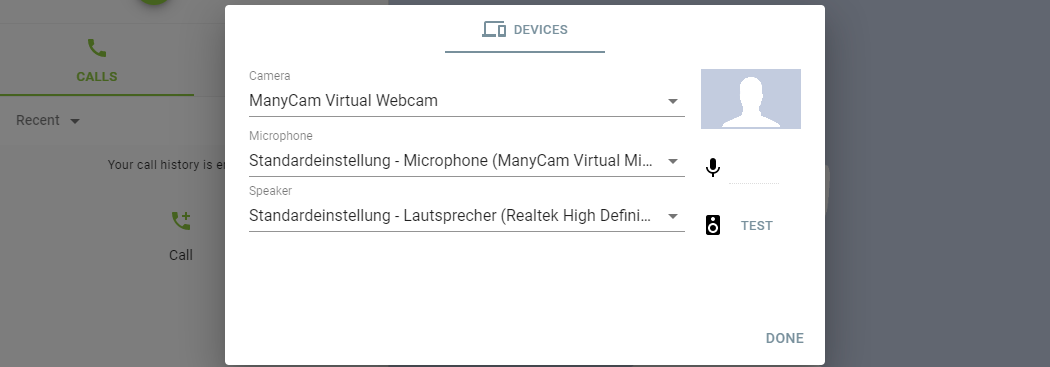
Kopano Meet will use the default devices for your microphone and speakers and the “front facing” camera automatically. If you want to use a different device you can switch this from the settings screen.
Warning
Changes to devices will only be put into effect after confirming the dialog via the “DONE” button.