2. Using Kopano Web Meetings
In this chapter we will introduce you into Kopano Web Meetings and show you how to set up calls and use the advanced real time communication options.
2.1. Start Kopano Web Meetings
In your Webapp, you can start Web Meetings with a click on the icon.
The icon is green when you are logged in and grey when you are logged off.
Toolbar Web Meetings on
2.2. Kopano Web Meetings overview
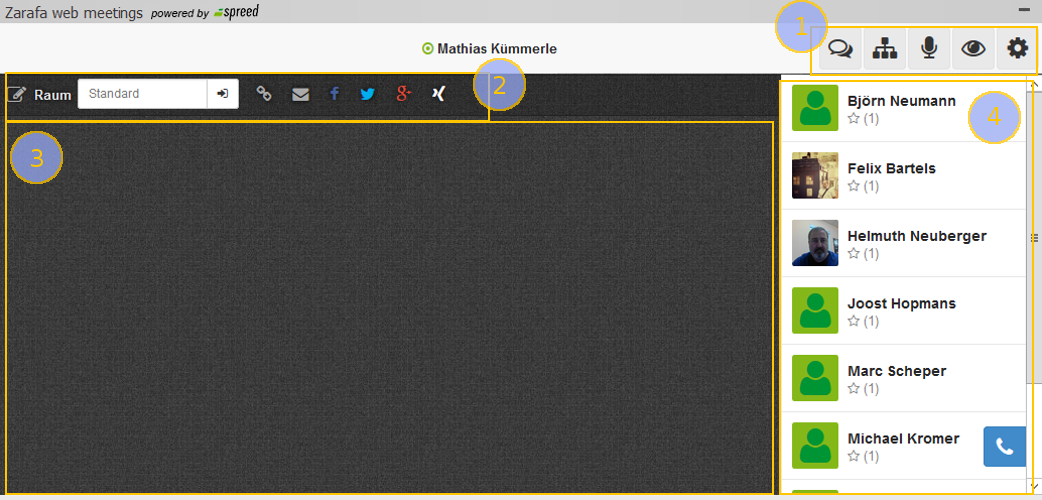
Kopano Web Meetings overview
The main areas are:
- The toolbar
- Meeting area
- The content area
- The buddy list
2.2.1. Kopano Web Meetings toolbar
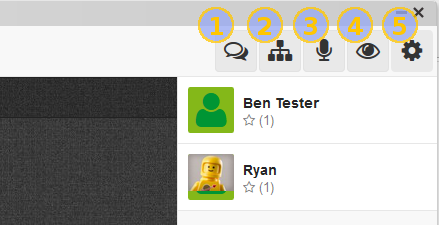
Kopano Web Meetings toolbar
The Kopano Web Meetings toolbar has the following buttons:
- Start chat
- Show contacts / buddies
- Microphone on / off (mute)
- Camera on / off
- Preferences
2.2.2. Kopano Web Meetings meeting area

Kopano Web Meetings meeting area
In the Kopano Web Meetings meeting area you have the following controls:
- Start or go to a new room
2.2.3. Kopano Web Meetings active meeting controls
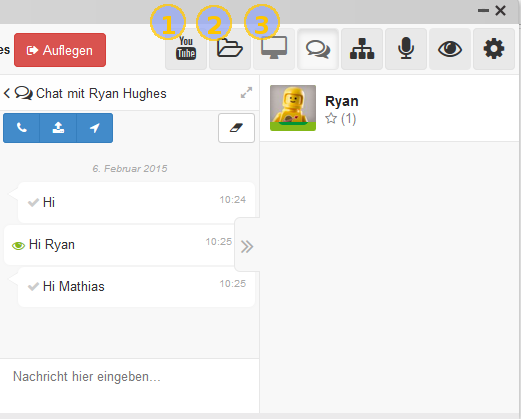
Kopano Web Meetings active call
In an active Kopano Web Meetings call you have the following additional controls:
- Share a youtube video
- Upload and share a PDF presentation
- Activate screensharing
Note
While you are in a video call you can double click in the video view area to enter or leave full screen mode.
2.2.4. Kopano Web Meetings screen sharing extension for Chrome
To use the Web Meetings screen sharing feature in an active call, you need to first install the Spreed.me screen sharing extension from the Chrome Web Store (free of charge). To install the extension please visit the following page:
https://www.spreed.me/extension/
Note
Screen sharing is only available for Google Chrome
Important
When using screen sharing on high resolution screens and internet connections with limited bandwidth, please take care to share the lower resolution screen or a specific window instead of the entire screen. The larger the screen is the more bandwidth is required.
2.2.5. Kopano Web Meetings screen sharing extension for Firefox
To use the Web Meetings screen sharing feature in an active call with Firefox 38 or later, you need to first add your domain to the screen sharing white list in Firefox’s settings. Please proceed the following way.
- Type “about:config” in Firefox’s url line
- Search for “media.getusermedia.screensharing.allowed_domains” in the settings search field
- Double-clicking the setting opens an entry field to edit the list of allowed domains
- Add “*.your-domain.com” and “your-domain.com” for your WebApp server host name separated by commas to the list
2.3. Starting a video conference or Chat Session
There are different ways to start a video conference or chat session. In simple words: everywhere you see the green status indicator LEDs you can right-click and use the contextmenu by selecting Start Web Meeting Video Call or Send Web Meeting Text Message.
The context menues look like these:
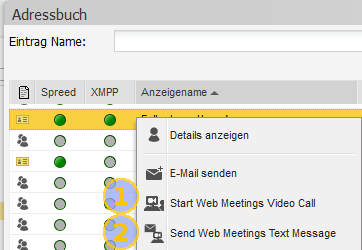
GAB context menu
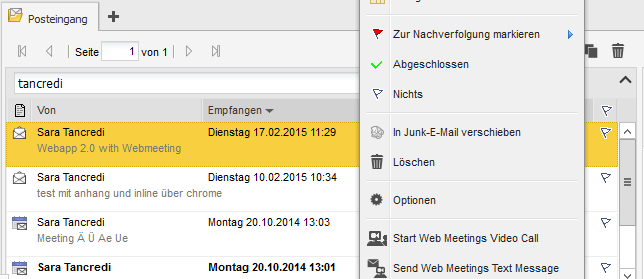
Mail list view context menu
Mail sender and recipients context menu
Depending on your choice the web meeting overview will show up with a started chat session like in the image below.
Kopano Web Meetings activated chat
If you choose to start a video call then a call is initiated and waiting to be accepted by your calling party
Figure 2.11. Kopano Web Meetings activated call
Note
If your browser has no access to your microphone / camera a browser message appears asking for permisssion. The Kopano web meetings overview also tells you with a text in (1). The call setup is halted until permission is granted.